Showing posts with label Stirling Engine. Show all posts

Saturday, May 25, 2013

The End of an Unsuccessful Project                                                

I cannot find any air leaks now and yet the engine is not self sustaining. The force delivered by the piston seems to be too small to turn the flywheel. I think I have come as far as I can with this design and it’s time to call the Terrapin project dead.


This is video of me hand-cranking the engine.


Parts of this project worked quite well:

  1. A cheap and airtight piston can be made with a bike inner-tube and a bucket.
  2. The phase angle between the power piston and regenerator can be easily adjusted on the fly by using two concentric axles pinned together by a pointer on the flywheel face.
  3. A very good regenerator can be made by alternating aluminum screens with nylon netting. The temperature of the lower cold chamber did not appreciably increase over the nominal 22C even thought the top chamber was over 100C, while the engine was being cranked.
  4. An adjustable and calibrated electrical heat source can be made from a thrift store toaster and a wall dimmer.
  5. The power piston stroke length was adjustable on the fly by moving a control rod.

Parts of the project I had trouble with:

  1. The strength and insulation properties of wood are superb but it is very difficult to make an airtight wooden box.
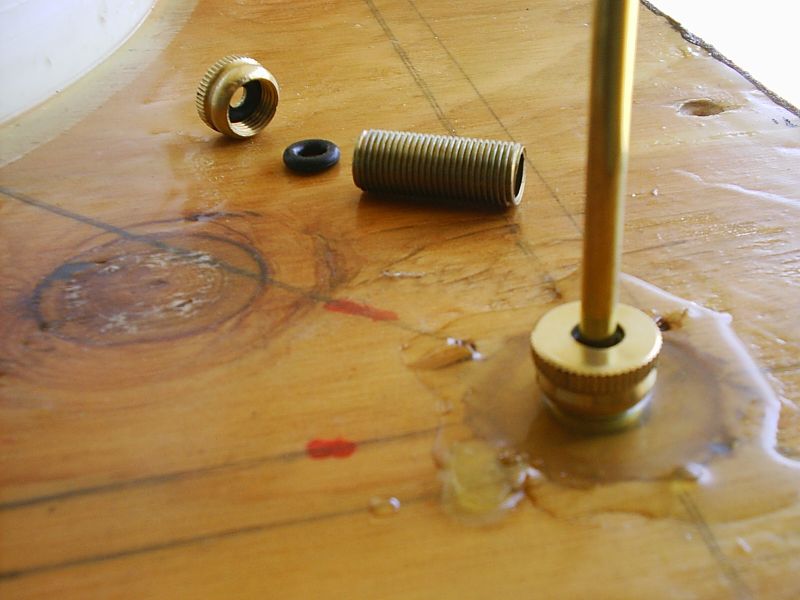
  2. The regenerator rod O-ring seals, that I made, needed to be adjusted very tightly to become airtight. This caused friction during the regenerator rod travel.
  3. The engine produced very little power with the 80C temperature gradient. The size of the regenerator vessel must need to be very large to produce usable power at such temperatures.
  4. The project was over-budget. The parts that make up the engine cost about $175.

Closing Remarks


Stirling Engines still intrigue me and I may very well attempt to build another. Here, I learned of several new techniques that I can apply to future projects. For low temperature-gradient engines, the displacement vessel must be quite large to develop appreciable power. Building large airtight insulated vessels that can withstand alternating positive and negative  pressures is challenging.


Disgruntled                                                                                   


Well, I got so disgruntled with the engine that I worked on other projects for a while.

No mater how many coats of epoxy resin that I applied to the outside of the box, there were always air leaks (detected by soapy water) bubbling from multiple odd places on the sides and lid of the box. The wood is very porous to air and it lifts and splits the brittle epoxy. I have used resin reinforced by fiberglass cloth before and it is rather tedious to work with and it also leaks air if every single hole in the cloth is not completely saturated with resin. I looked around for an alternate sealing material and settled on Kevlar reinforced bed liner.

The stuff is not cheap; a quart cost me $36 !  I applied four coats of the black stuff to the sides, bottom and top lips of the box. I coated the inside of the lid as well. I now use aquarium glue and two inch screws to secure the lid.


I reworked the difficult-to-adjust regenerator rod seals to a better design using modified lamp parts. I glue one inch long, 3/8” diameter, threaded lamp tubes into the lid where the regenerator rods pass though. Then I screw on 3/8” brass lamp caps that has a hole drilled in it for the rod to pass through. An O-ring fits nicely under the cap and provides an easily adjustable air-tight seal. Am I air tight? Time to test the engine again.

Sunday, March 24, 2013


Engine Still Not Working                                                                  


I have, again  painted the outside of the vessel with epoxy resin, used aquarium glue to seal the lid and reworked the regenerator push rod seals to make them tighter but I am still having low compression problems. The engine does not produce enough power to run.

I measure that 1.2 foot-pounds of torque  applied to the crank is the force needed to overcome all engine friction and turn the flywheel. Ten pounds of force delivered by the power piston would be in excess of what would be needed to keep the engine running. When room pressure gas changes temperature from 25C to 100C it’s pressure increases by about 5% (constant volume), or a force of about 15psi * 0.05 = 0.75psi. For the 100 square inch piston face, there should be over 70 pounds of force on that piston. With a heated engine and with the piston linkage disconnected, the piston moves through more than it’s designed 1.5 inch stroke, powered solely by the regenerator movement. It is remarkable how fast the regenerator changes the gas temperature/volume; it is pretty much instantaneous. The force delivered by the piston is only a few pounds.

I sprayed the outside of the vessel with soap suds and found a few more small air leaks. I will attempt to patch. I am disappointed with my ability to make an air tight container out of wood. I chose wood because it has good heat insulation properties and is fairly rigid. A metal container would be rigid and airtight but would bleed heat along the regenerator pathway. A plastic container may not be rigid at 100C with fluctuating positive and negative pressures.

My budget and patience is running low. There are plenty of other projects I could work on. If I am to continue with this project then I need to get this engine to function soon.

Friday, March 15, 2013


The Terrapin: Linkages, Regenerator Cam and Timing.                        


Vector sum of force (red) applied to a linkage.
I am at the end of the construction phase; I have finished making the linkages between the active components of the engine.  A linkage is a straight rod of metal or of wood that has pivot points at it's ends. For a linkage that is free to rotate about pivot points, force is transmitted longitudinally along the  the major axis; hence the rod does not need to be very thick. Some are made from ¼” square aluminum bar and some are made out of ½” wooden dowels.

For pivot points that rock back-and-forth, I pressed brass bushings into holes drilled in the active component with ¼ inch steal bolts as pivots. On the end of the rotating power crank shaft, I pressed a skate ball bearing into a 7/8” hole drilled into some 1/4'” aluminum stock that I had.


Regenerator cam and power piston crank.
The regenerator cam is an offset 8” aluminum disk that rotates inside a box made out of sandwiched sheets of acrylic and plywood. There are four screen-door rollers in the box that hold the disk at the edges. The net effect is that the box moves back-and-forth six inches, each time the flywheel rotates once.


Regenerator linkage.
The passive cable linkage to the regenerator did not work out. One edge of the regenerator would occasionally hang on it’s gravity fall on the way down. I changed the linkage system back to the original active push/pull rod system. The regenerator cam now rocks two wheel segments back and forth. The wheel segments drive vertical dowels that actively lift-up and actively push-down the regenerator. A 374 gram counter-weight is attached to the flywheel at 13 inches from the hub, for regenerator balance.


Timing pointer on flywheel.
I welded some steel stock to a 1” long nut to make a timing pointer that can be very firmly attached to the inner threaded axel that emerges from the flywheel face (the power piston output). The other end of the pointer has a peg that fits into a hole in the face of the flywheel for the desired timing position. A ninety degree phase angle between the power piston and the regenerator positions is nominal, but I will be playing with that. The pointer also acts as a flywheel counter-weight for the power piston system.


As I turn the, now finished, engine’s flywheel by hand, I can hear the hissing of many air leaks coming from the vessel. Indeed, if I blow liters of air in though the vessel’s vent tube, it leaks out before the piston has a chance to move. I have almost total loss of compression. I will have to disassemble the vessel and patch air leaks before trying out the engine.

Thursday, February 21, 2013


The Terrapin: Frame, Power Beam, Cranks, Flywheel and Timing  
                                       

Balsa-wood 1/10th scale model
I have simplified the stirling engine design somewhat after making a 1/10th scale model to see if any of the moving parts were going to bump into each other. They don’t, but I decided to lift the regenerator with cables and let gravity take it back down rather than the earlier and more active push-rod-connected-to-wheel design. I’m hoping the regenerator will not jam on it’s way down.


Engine frame.
I built the frame for the engine out of five 2x4s and a quarter sheet of ¼ inch pressed wood. It has a 2’ x 3’ footprint and stands 4’ 3” tall.


Power beam
I welded several pieces of ¼” steel bar to make the power beam. Force from the power piston is transferred to the power beam along an 11 inch curved brass track that allows the piston stroke length to be adjusted from 0.1 inch to 1.5 inches in 13 increments. There is a locking handle that holds each notched increment in place. The beam space between the brass track and the surrounding welded steel is filled in with epoxy resin. The reason the track is curved is so that each power beam position remains centered with respect to the flywheel and the power piston. If the power beam is held in it’s horizontal position (Crank 90° from TDC) then the piston is at it’s mid position regardless of the power increment setting.

Welded parts
 I welded some 5/8” all-thread, ¼” iron pipe and some 1/8” steel bar to make the dual concentric crankshaft. There is a internal threaded crankshaft (offset 1.125”) that harvests energy from the power beam and an externally concentric  crankshaft (offset 3.125”) that will drive the regenerator motion. The external shaft is fixed to the 3’ flywheel and the internal shaft passes out of the front of the flywheel where it can be attached to the flywheel at chosen angles, thus determining the timing between the two cranks. For any chosen timing angle, both shafts are fixed together and rotate at the same speed. 

Thursday, January 31, 2013


Half Way Mark                                                               

The stirling engine vessel/piston unit is finished and relatively air tight. When I push down severely on the piston it moves ever so slowly downward. I have painted the whole outside of the wooden box with epoxy resin and I hear no air escaping from the weather stripping seal under the lid or through the regenerator rod seals in the lid. Wherever the leaks are, they are pretty small and I am hoping that they do not sap too much power from the engine.


Regenerator rod and seal
I did a preliminary engine test by heating up the upper chamber to about 70C and watched as the piston slowly moved about ¾ of an inch outward. I then manually moved the regenerator upwards and the piston sucked back in. Letting the regenerator slip back to the bottom of the vessel caused the piston to move outwards again. This thing just might work!


I am at the project's half way mark. Next I will build a frame to hold the vessel, flywheel and linkages. I hope to have the engine running by mid spring and then take a break to go camping in late March.

Sunday, January 20, 2013


The Power Piston                                                                                  


Christmas chaos is finally over and the weather has warmed enough to start working on the heat engine project again. 

I made a major progress on the power piston design. 


 I had been planning on making a rolled cloth piston seal by sewing together the ends of a yard long  strip of raincoat material to make a closed loop.  One edge of the loop would be attached to the piston (green) and the other edge would be attached to the slightly larger diameter cylinder (blue). As the piston moved in the cylinder, the excess cloth (red) would have rolled above or below in the gap between the moving parts. The cloth seal would have had to be hand sewn, would probably leak, would have a short lifetime and be difficult to replace.


Instead, I made the piston seal from a $4.99 twelve inch bicycle inner tube. The cylinder is made from trimmed down 3 ½ gallon HDPE paint buckets. The piston is made from slightly smaller paint buckets. I put paired conical bucket pieces together such that the piston (green) has a slight hour glass shape and the cylinder (blue) has a slight barrel shape. This makes the gap between the cylinder and piston like the space between the symbols <>. The inner tube (black) is inflated in the space between the piston and cylinder walls and fits into the widest part of the gap like this <0>. As the piston moves in and out, the inner tube rolls minimally in the gap and is self-centering to a mid-stroke position. The piston face has 95 sq. inches of area so 1 PSI of pressure difference will produce 95 pounds of force. Stoke lengths are at least 0.75 inch from center, both outward with positive pressure and inward with negative pressure, for a combined piston travel distance of at least 1.5 inches. The piston was easy to make, it is robust in design and it does not leak. The year is off to a good start.


Thursday, December 6, 2012


Finished Regenerator, Vessel Lid and Heater                                              


The 2.25 inch thick regenerator is made from alternating layers of aluminum screen and nylon net fabric in a light-weight wood and aluminum frame. I am thinking that the nylon insulation between the sheets of aluminum screen will retard the heat trapped in the regenerator from creeping in the direction of airflow. The 3 lbs of aluminum (94 sq ft of screen) makes a regenerator volume that is three times smaller than the cold space volume, but air emerging from the regenerator should still be adequately warmed or cooled.

Air is kept from flowing around the regenerator by lightly packed polyester between the regenerator and the wax polished glass walls of the box. The regenerator will be moved the 6.25 inches up and down in the box by four 5/64” vertical rods that enter though #106 o-ring seals in the regenerator box lid corners. The box lid will be held tightly down on a weather stripping seal by eight draw catches.

The Heater

The terrapin is my first attempt at building a stirling engine. I have decided that I can more easily regulate temperature and keep track the amount of energy entering the engine, if I heat the working gas using an electric element rather than using a hot water pipe. Using the information gained from these first experiments, I could modify this same engine to use another heat source, or I could build a bigger sized engine, if it turns out that the basic concepts of this engine are correct.

I had planned on using one-way air valves to have air enter the heater only during the warming part of the engine cycle, as the cooling is done in the case of the cold heat exchanger. I can simplify the heater design by cycling the electric heating element on and off such that it warms the surrounding gas only during the warming part of the engine cycle. Gas can now take the same path in and out of the power piston but is heated only as air enters the piston. I could tinker with the timing of the heating but I want to stay close to the concept of having the power piston pumping gas through a hot heat exchanger, even though the power piston is somewhat out-of-phase with the regenerator movement.


The heating element comes from a thrift store toaster and is wrapped around glass scaffolding which sits in the lid space between the regenerator box and the power piston. Power to the heater is run though a dimmer switch. A power range of 27 watts to 732 watts is available by adjusting the dimmer. At full power the heater elements are glowing red.   I have found that a resting cylinder air temperature of 100C can be maintained with a power setting of 123 watts. I modified the circuit inside the dimmer switch by running a pair of wires from the triac’s gate circuit to a remote switch, such that the heater circuit can be turned on and off as needed. 

Monday, November 19, 2012


A Second Look at  Regenerator Analysis                                              


I purchased 100 square feet of aluminum screen ($28!) and also some cheep nylon netting to make the regenerator. The displacer/regenerator vessel has already been made with 16” x 16” x 8.5” dimensions. I have 60  layers of 15” x 15” screen alternated with nylon net insulation and was alarmed that it only filled the first two inches of the planed four inch thick regenerator. Will this be a good enough regenerator or should I buy more aluminum screen?

 I made an excel sheet that models the temperature profile across the regenerator. I first calculated out the solid and gas heat capacities of a regenerator unit cell. A unit cell has the volume that is between two holes in adjacent aluminum screens. Then I calculated how much heat it would take to warm a unit cell of cold air to the solid phase temperature for the first screen layer that it met. I included an efficiency factor; incoming air does not necessarily have the time to reach the solid phase temperature.


Knowing how much heat the solid phase gave up to the gas, I can calculate the new solid phase temperature. I repeated the calculation for each new cycle of unit volume gas crossing the first screen.  Similar calculations are done on the rest of the regenerator screens where the incoming gas temperature is from the previous screen cell from the previous cycle. After the whole column of unit cells from the cold space pass into the regenerator (195 cells in this example), I graph the instantaneous temperatures of the solid and the gas phases in the regenerator. When the air stops moving the gas phase temperature rapidly assumes the local solid phase temperature because the solid phase has 96 times the heat capacity of the gas phase by regenerator volume.

So how does this 60 aluminum screen regenerator perform? If incoming air warmed completely to the solid phase temperature (100% efficiency) then the whole 6.5 inch column of cold air would be warmed to the ambient regenerator temperature (60C) by the first ten aluminum screens! At 50% efficiency (the gas is warmed half way to the solid temperature by each screen) the gas is totally warmed by the 14thscreen. At only 10% efficiency, gas is warmed by the 50thscreen.  Indeed, if I put my lips on the regenerator material and blow, after 30 screens I cannot feel warm air come out the other side. I am estimating the regenerator efficiency is 50% + 25%. Certainly no additional layers of screen are needed in the regenerator.

 The biggest surprise for me was that the first big slug of cold air, never really cools down the first screen to the incoming gas temperature. The solid phase has a large heat capacity which takes a lot of gas phase to cool it down. This problem is compounded by a Zeno’s Paradox effect where the gas becomes increasingly inefficient at cooling the solid phase as gas temperatures approach solid phase temperatures. It takes an efficiency of 70% for the first screen to drop to 30C with incoming air of 20C. This is a bit disturbing because it means that the air coming back out of the regenerator’s cold side will be  warmer than it was on the way in. So in effect, some of the cool was left in there.

It hurts my head to think about it, but it looks like some of the cool from the air, stays trapped in the regenerator solid phase during the warming part of the cycle. If this occurs, the first screen’s starting temperature would be a little lower each cycle until it is at the cold space temperature. The same would be true at the hot end of the regenerator; heat would build up until the last screen reached the hot space temperature. Because the  air in the regenerator moves back and forth, an even temperature gradient would form across the regenerator. This makes intuitive sense to me but it is hard to prove. Technical articles I have looked at, do say there is an even temperature gradient across a regenerator.

I reworked the excel sheet to make the solid phase beginning temperature be a gradient from the cold space temperature to the hot space temperature. The 60 screen regenerator works even better with this model than with the non-gradient model. Even at 25 % efficiency, very little cool leaks out the hot side of the regenerator. In any case, I see no reason to add more screens to the regenerator.

If you want to play with the excel regenerator temperature profile sheet you can download it at https://docs.google.com/open?id=0B9fsJB6CcZqrSU5YTEZYUFB1U2s


The Terrapin: Vessel, Cold Heat Exchanger and Cold Air Pump.                                                                                                  


When building robotic projects, I have a tradition of naming them after the scientific name of the animals they resemble. This engine may well be feeble and slow and it has a boxy look about it. The scientific name of the box turtle is terrapene carolina. I was thinking of naming this engine, the terrapin. Hey, I have to call it something.


I chose the largest regenerator vessel volume (1.25 cu feet) that would still be in the proper compression range for a high temperature of up to 100C. It is about twice the size of the model I had originally envisioned, so I am going to be over-budget.


The regenerator vessel was made from a big plywood lined wood box whose floor is sealed with resin and whose walls are covered in glass.


The water cooled heat exchanger is a 13 foot coil of ¼ inch OD copper tubing alternating with one inch strips of ¼” wire mesh.


The cold coil fits snugly under a 3 ½ gallon HDPE paint bucket lid that was modified into a cold air pump with the help of some sheet metal work and some PVC backed polyester material from a cheap rain jacket. The pump draws air across the cool coil only during the cooling part of the engine cycle as the regenerator is moving up. During the warming part of the engine cycle, as the regenerator moves down, the already cooled air contained in the pump, moves into the regenerator to be warmed.


Friday, October 26, 2012


Casting About For Engine Dimensions                                                            


I found several web pages about designing Stirling engines that were quite helpful. Zig's HomePage on Stirling Engines at http://mac6.ma.psu.edu/stirling/has many valuable and quite technical links. Doug Conner at http://www.solarheatengines.com/shares good experimental data, showing that the high to low temperature ratio must be of slightly higher value than the ratio between the largest and smallest engine volumes. Indeed, if the power stroke is larger than the changes in volume due to temperature, then the engine is not going to run. Also if the power stroke is too short then little power is produced. For a given engine and temperature difference there is an optimum power stroke. The power stroke is very sensitive to changes in temperature.

If I am understanding this right, I made an excel sheet that theoretically models the relative power produced by different engine designs. I reckoned that the torque produced by the engine (power?) is the pressure force on the piston, times the crank arm radius. The force on the piston would be proportional to the difference  in volumes between the total real physical engine space and the ideal total engine volume that the gas wants to expand into, if it were not bound. The ratio between these volumes needs to be above one, if the piston is to move outwards and less than one if the piston is to move inwards. The crank arm radius is proportional to the size of the power stroke. Want a bigger stroke; make a wider crank.

Another assumption I made was that the average of the so-called ideal engine volume exactly matches the average of the true physical volume of the engine. The pressure inside a running engine bounces positively and negatively about normal room pressure. There must be small venting of the vessel to the outside or the piston would blow out as the engine warmed up and the air expands. Some of the ideal volume has leaked away from a hot engine. So I calculate the maximum ideal volume by adding half the ideal increase to the real average volume and the minimum ideal volume by subtracting half the increase from the real average volume. The difference of the min and max ratios of the ideal to real volumes, plus one, is as close as I come to a number representing engine stroke force.

I multiply the above ideal-to-real volume ratio by the depth of the stoke and the area of the piston head to get a torque value that is in arbitrary units. Plots of length of stroke vs. torque, form smooth rising then falling arcs. Maximum torque should be the stroke length at the top of the arc. Interestingly, the point of maximum torque is when the engine’s real compression ratio equals the ratio between the ideal volume and the real volume. I am assuming this would be for an engine with no load or friction. I am expecting a real loaded engine would use somewhat smaller power strokes to produce optimum power than the graph predicts .

If you want to play with the Power Design excel sheet, then you can download it at the following link. All but the highlighted cells are protected from entries but you can unprotect the sheet in the Excel Tools menu if you want to tinker around with the formulas.


Sunday, October 21, 2012


Rethinking the Engine ...  Plan B                                                          


I am starting to get a better understanding of the materials I will need to build an engine. What I have come to realize, is that a type A engine needs a very large amount of gas volume in each of it’s pistons. The power produced by the engine comes from the difference of the volumes of the hot and cold pistons. For a 100°C temperature difference, for each unit of cold volume there is 372/272 or 1.37 units of hot volume. The combined piston maximum volumes would be 2.37 units and the difference of the hot and cold volumes is 0.37 units. That means that only 0.37/2.37 or 15.6% of the piston movements are converted into power. In a type B engine, all of the piston’s power stroke  movement is attempted to be harnessed for power. It's the same amount of work; just using a smaller piston. The upshot is I can make a much bigger B type engine by using the same piston I was planing to make for the A type engine.


The reason I wanted to build a Type A engine in the first place, was to utilize the pistons to pump gas through heat exchangers on the way out of the regenerator. I reckoned that the regenerator would need to be stationary to do so. I think there is a better way.

 I have a new design for a four beam type B engine that will meet my design concepts, is mechanically simpler than the type A and produces more power per volume of the, now, single piston. The model will be build around an 11 inch diameter piston made from a paint bucket and will have an adjustable stroke of up to 1.5 inches (145 cubic inches). The gas inside the piston will be at the hot working temperature and will flow into the piston through a stationary heat exchanger. There will be a small pump at the bottom of the regenerator/displacer vessel, operated by the displacer movement, that pumps air though the cold heat exchanger.


Friday, October 19, 2012


Thinking about Regenerators                                                                                                              


Imagine a regenerator that has room for gas of volume V, in and around the wirey solid  material that it contains. Let’s say the regenerator (and the gas it initially contains) is at a temperature half way between the hot and cold temperatures of the engine. Now, very slowly, push in cold gas from one end. The gas is coming in so slowly that it comes to temperature equilibrium with the surrounding solid phase as it moves along. Push the cold gas in, such that the entire volume V is displaced by new gas. This takes less than volume V of cold gas because the cold gas expands as it warms up. The leading edge of the cold gas warms up to the solid phase temperature quite quickly because it is always encountering new warm solid phase. After the gas is at solid phase temperatures, it no longer cools the regenerator solid phase. The net effect is that the cold temperature front lags behind the new gas front, by quite a bit. In fact, because the heat capacity of a volume of the solid phase is about a hundred times that of the same volume of the gas phase, very little of the regenerator material is cooled down. A temperature curve along the cold gas filled regenerator at equilibrium might look like the solid blue line in the graphic.


In an ideal world, if you played the above scenario in reverse, then all the air coming back out of the regenerator would be cold and would contract to its original size and the regenerator would revert to a midpoint temperature.

If hot air is slowly pumped in from the hot side then the equilibrium temperature curve would look like the solid red line. A larger volume of hot gas needs to be pumped because it contracts inside the regenerator. The volume of cold or hot gas that undergoes expansion or contraction during a cycle is represented by the light red and blue shaded areas on the graph. It is important to note, that during each single hot or cold part of the cycle, that both the hot and cold working volumes are undergoing contraction or expansion. As the hot cycle part of the gas exits the regenerator it expands and, at the same time, the cold cycle part of the gas enters the regenerator and also expands. So the total volume of gas expanding or contracting during each half cycle can be represented by adding the blue and red areas on the graph. The white areas of the graph are volumes where work is not being done.


A longer, thus narrower regenerator (V is being held constant), causes higher gas velocities and causes more resistance to gas flow. Higher gas velocities could cause the gas to move though the regenerator without a chance to come to equilibrium with the surrounding solid phase, or perhaps faster moving air removes (and adds?) heat faster from the solid phase. I think ether of these effects would  widen the ideal sharp temperature gradient shoulder on the graph. 

Also, it is possible to saturate the first part of the regenerator solid phase to the temperature of the incoming gas. The more gas that enters the regenerator per square unit of it’s face (long and narrow regenerator), the more likely that part of the regenerator will go to saturation. None of the gas in the part of the regenerator at saturation undergoes contraction (or expansion) and robs pressure from the power stroke.


A regenerator with a wide face and with very shallow depth would have an extremely sharp temperature gradient from one side to the other. Heat does not like to stay where you put it; it diffuses away. Regenerators can be built with stacked wire screens that run perpendicular to the gas flow, to try and keep heat in the same lateral plane. But if the regenerator is too shallow the temperature gradient could be muddied and heat exchange inefficient. 

I conclude that the amount of regenerator solid phase is not critically important as long as it is in large excess of the gas’s heat capacity. 
A target volume  for the gas phase part of the regenerator is simply the cold piston volume adjusted to the mid- temperature in degrees Kelvin or 
VRgas = Vcold x Kmid / Kcold. 
The volume (cM3) of the solid phase part of the regenerator is its weight divided by its density, or for steel  
VRsolid = Grams of solid phase ÷ 7.8 G/CM3
The total regenerator volume is the sum of the solid and the gas volumes. 
The optimum shape for a regenerator is probably slightly wider across the face than along the axis of gas flow. I’m hoping the shape is not critical over a wide range of values.

Sunday, October 14, 2012


A Ten Beam Engine                                                                                                  


Now I know why the SunPulse folks went with a Beta type engine. The timing and volume of single power stroke is much easier to adjust and the controls make intuitive sense.


To make an alpha engine act  similarly to a beta engine, the vessel containing the displacer moves and the displacer remains stationary. Think of both pistons moving together as one, surrounding a stationary displacer. Here, the displacer is the regenerator with the heat exchangers inside. I want to do it this way so the pistons can pump air though the heat exchangers, hopefully improving power.


The ten beam engine design uses an adjustable chain and four sprockets to change crank phase angles. Changing a piston volume is done with a cantilevered lever system. The changes these controls make in the piston volumes and timing are now independent of each other, so adjustments on the fly should make intuitive sense. 

I have a space in the garage corner that is 5 x 3 feet where my table saw now sits. I am thinking a full size engine should have a 4’ x 3’ footprint. The pistons each would be 24” in diameter with about 2.5 inches of travel giving a volume of 1130 cubic inches . A half scale model would be 24” x 14” with 141 cubic inches per piston. The quarter scale 18 cubic inch piston is probably too weak to get an engine to turn. There is an eight foot space behind the garage where  a monster 5.2 cubic foot engine could sit. My neighbors would probably call the cops on me.

Friday, October 12, 2012


Stirling Engine Designs                                                                        


I want to build an alpha type Stirling engine where the stationary regenerator sits between two opposing pistons. The pistons could be connected to cranks with two beams (gray).


It is possible that a two beam engine, with cranks of the same size, set at 90 degrees phase, could be the best of all possible configurations. What a coincidence it would be, if this simplest engine was the best. I cannot help thinking that the engine’s power would be optimized if there was an adjustment for timing as the engine ran at different speeds; as is the case of a car engine. 


Adjustments to the timing and volumes can be achieved with as few as four beams


The combined volumes of both pistons follow a sinusoidal curve of changing volume over time that is close to, but not exactly, a sin wave.


By playing with an excel simulator, it looks as though all volume curves are possible by tweaking the crank diameter and the phase difference between the two cranks.


 However, I see that if the phase angle between the cranks is changed, then both the timing and the amplitude of the piston volumes change unpredictably. The same is true if I change a crank diameter, both the amplitude and the timing of the piston volumes change. This is going to make it difficult to design an engine that I can make intuitive changes on the fly.

I’m currently working on a ten beam plan that is mechanically complex. I am concerned about the inertial mass of all the moving parts and about vibration from the many joints rattling.